
Portraiture: Before and After Editing
or
How I Avoid Going Too Far
*For this post I will be using photos from my previous post 'Senior Portriats' as examples. To see more photos from that post please click on the link listed under BLOG ARCHIVES.


Before any type of editing. After a softening of facial skin and blemish removal.
When I look at these two photos (and I assume when most people look at them) the photo on the right is immediately more appealing. There is nothing different about the posing or lighting, and nothing has been done to the coloring or exposure of the photo on the right. The only difference is the texture of the model's skin and the appearance of blemishes. She almost seems to glow in the after photo, and the overall look is more finished.
When I am smoothing someone's face I usually start with the blemish or discoloration that stands out most and work my way down. With this photo I began with the under eye. This model has bags under her eyes that stand out in the before photo. I used a smudge tool in my editing software to drag some of the lighter skin color over the dark bags. This helped to both smooth and lighten the bags in a relatively natural looking way, its very easy to over edit a face. I constantly change the zoom of my image so I can see both up close and as a whole what my smoothing is doing to a model's face.
I then looked for any blemishes with noticeable discoloration and used the same smudge tool to effectively erase them from the face. I followed up by very slowly using the smudge tool to smooth the texture of the whole face so that it was uniform with the other changes I made; it would look unnatural to have the under eyes very smooth and the rest of the face texture different. I finished with a pass over the entire skin using a softening tool to further mask any editing I had done. It's important not to soften the actual eyeball, I also avoid the lips and teeth. If your model's teeth are a little less than perfectly white - now is a good time to adjust them, there are many ways to do this. I try to make it as easy as I can, so I first try to select the teeth and adjust the amount of white. If that outcome looks funny or unnatural I play with different settings until everything looks right.
The most important thing to note is that I have not fixed any flyaway hairs or done any extensive airbrushing or pixel-pushing to try to change my model's appearance drastically. The more adjustments made the more noticeable the editing becomes.
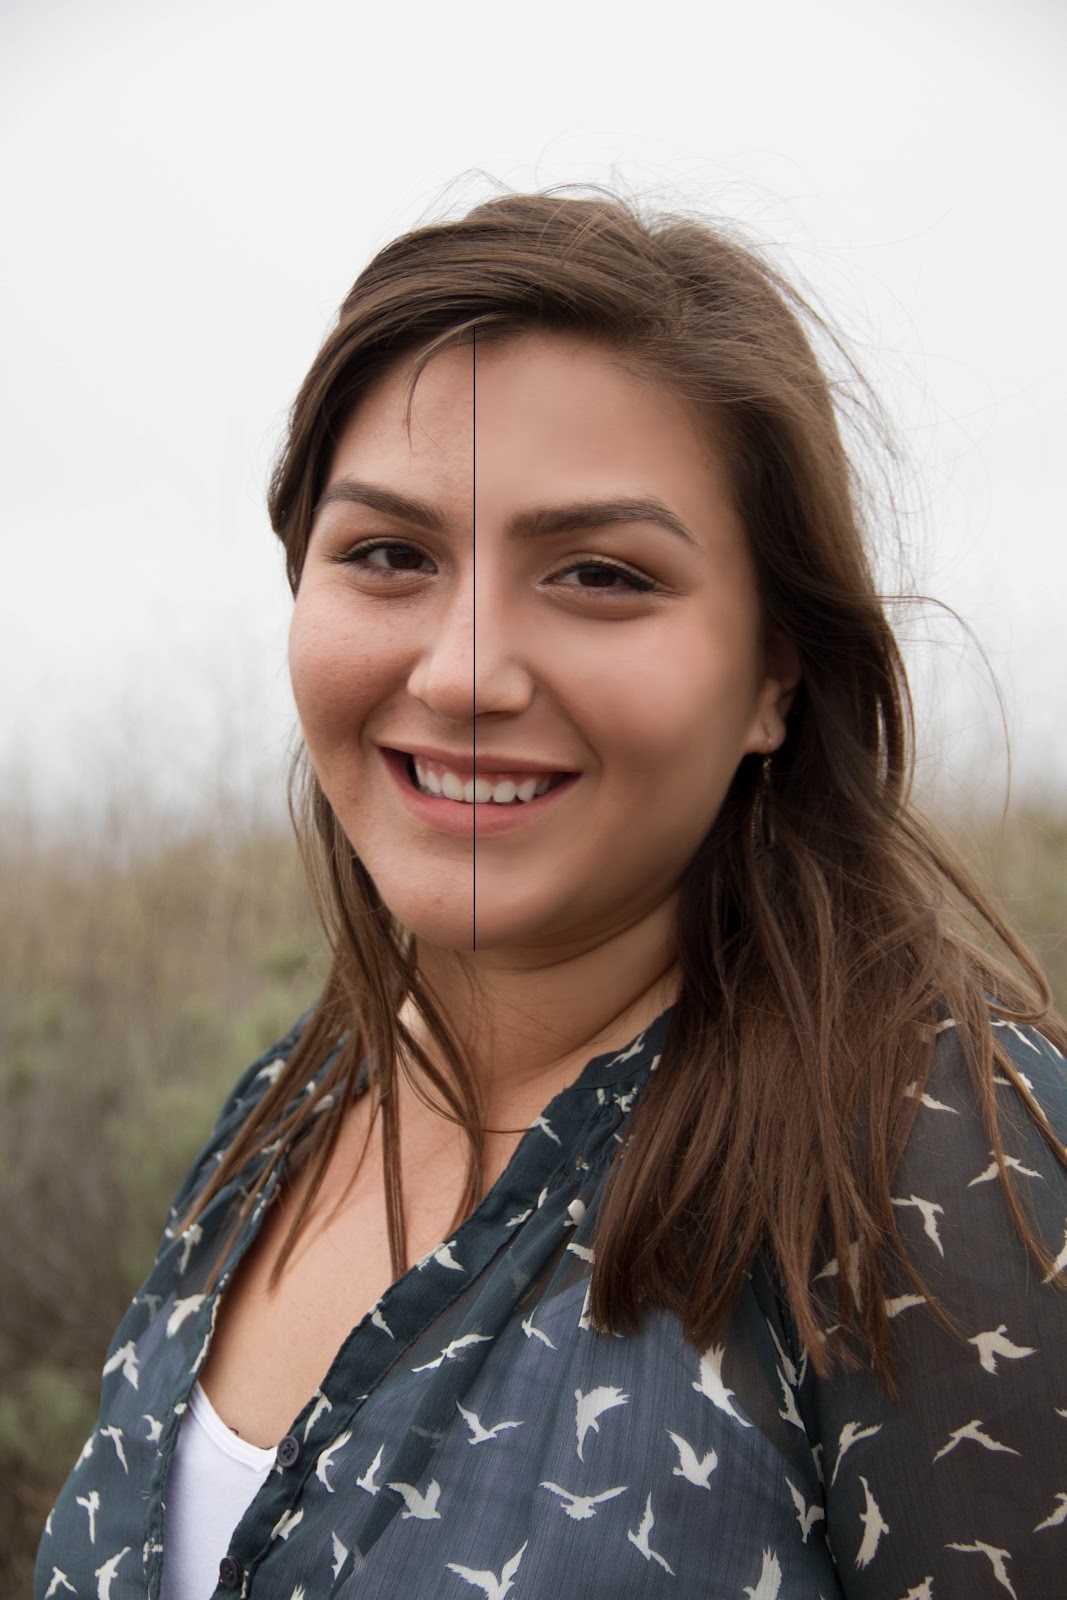
To the left of the black line is the untouched skin texture and to the right is the fully edited and smoothed skin.
No comments:
Post a Comment